When I started programming in JavaScript, just over a year ago, I found lots of great resources to get up and running, but obviously they were all focused on web development. It was hard to find content that was focused on how to use Node.js for SEO.
Hence, I've decided to put together a series of resources for anyone that wants to start their journey in Node.js for SEO and doesn't know where to begin. Today, we are going to start with the very basics: How to install Node.js and setup your laptop for JavaScript SEO Automation.
Node.js installation
 There are two ways to get Node.js in your machine. The simple way is just downloading it directly from the official website and installing it. However, there is a better, more future-proof way using Node Version Manager.
Node.js gets updated every few weeks with new capabilities and security updates. Additionally, you might want to upgrade or downgrade your Node.js version depending on the environment where you are planning to deploy your script.
Official release calendar from Node.js
For example, at the moment of writing this post the latest release of Node.js is version 16.1.0. But if you want to deploy a Cloud Function with Node.js in Google Cloud, you have to use version 12.0.0 for it to work correctly.
Installing Node Version Manager
Before getting Node Version Manager (NVM), make sure that you have a Node.js version installed in your machine. Otherwise you might run into issues.
Installing NVM is very straight-forward. If you're on Mac just download it from the official NVM repository.
If you're on Windows there is no official version but thanks to Corey Butler you can enjoy NVM in your Windows machine. Simply go to this page and download the "nvm-setup.zip" file that contains the executable to install.
Downloading and using Node.js through NVM
Once you have installed NVM, open your terminal and type nvm install latest to download the latest version from Node.js. Remember the version that you downloaded for the next step.
nvm install latest
Now you can start using the installed version using the same version you've installed using the nvm use {version number} command.
nvm use 16.1.0
Installation of your Code Editor
The easiest way to build your scripts is using a Code Editor, also called Integrated Development Environment or IDE for short.
My personal recommendation is to use Visual Studio Code. It's easy to use and very customisable. But you can use other good options like Atom or Sublime Text. 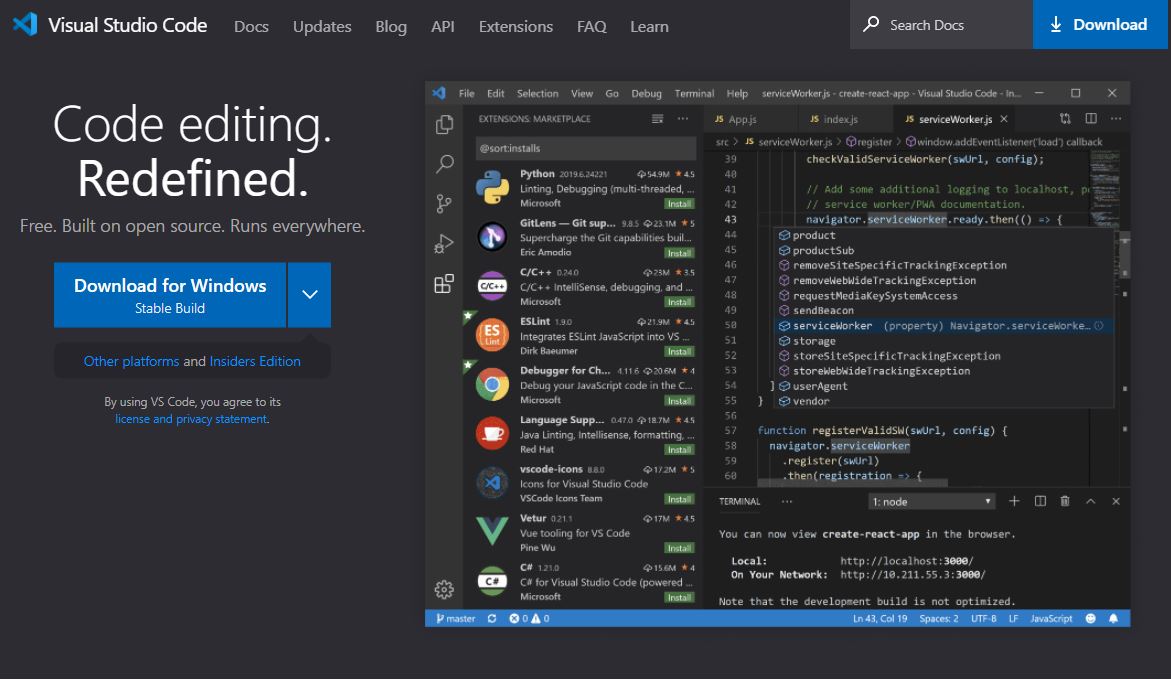
VS Code Extensions
Although Visual Studio Code is very good, there are some extensions that will make your life easier when coding in JavaScript. Below you can find a list of extensions that in my opinion are essential to install if you want to get started with Node.js for SEO.
Bracket Pair Colorizer. One of the features that make JavaScript a bit daunting is the use of brackets and the concept of "scope". This extension makes it very easy to see where your function or object starts and finishes and will save you hours.
Eslint is a very useful module to detect problems in your code. It's perfect when you get started because you might miss these bugs when running your scripts and it gives you very detailed info on where to find the issues.
- Prettier - Code Formatter is one of my favourite VS code extensions. At the beginning you want your code to work but you might develop bad habits. This extension forces your code to have the correct syntax which creates a subconscious muscle memory of how your code should look to be right.
- REST Client is essentially an API tester. It works very much like Postman or Insomnia but directly in your code editor. It's very useful when you are just starting with API and want to figure out what data you receive before writing the code.
- Edit csv is a great extension when you want to visualise your csv outputs directly in VS Code without the need to open them on Excel or Google Sheets. I normally use it as a validation tool to check that I have everything I need from the script's output before jumping into a spreadsheet.
Install new terminal for windows users (optional)
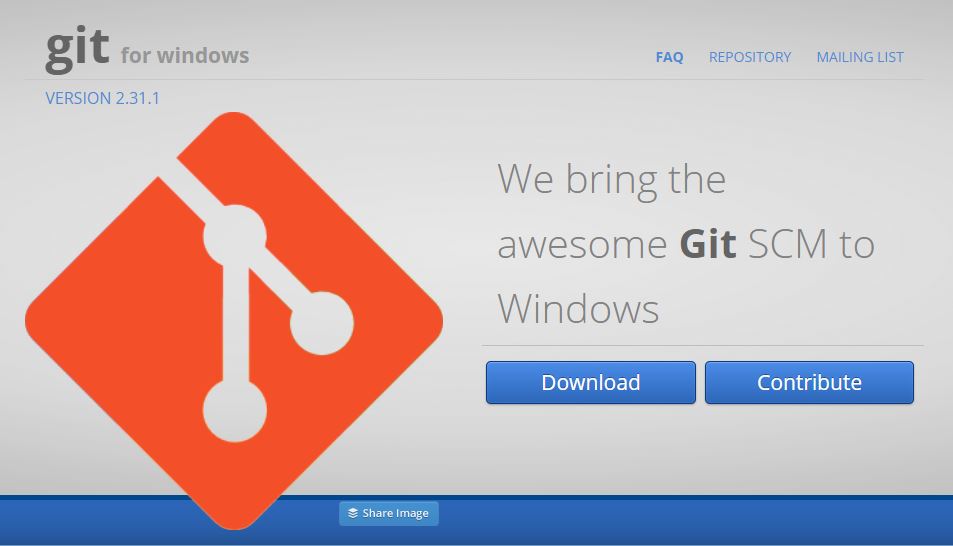
Although the Command Line can work well I've had some limitations in the past. Hence I recommend that if you're a Windows user to download Git For Windows.
You kill two birds with one stone. You get Git, which it's going to be useful as part of your coding journey, and you get a Bash emulator which mimics UNIX environments like Mac.
Create and Run your first Node.js script
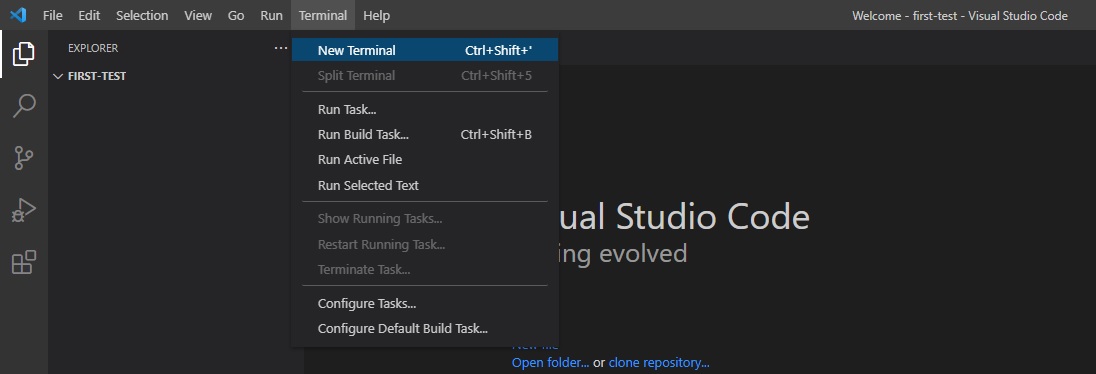
Start a new terminal. You can open a new terminal from the navigation menu (Terminal > New Terminal) or use the short-cut Ctrl + Shift + ' on Windows.
To keep your first script tidy, let's create a folder to store our code. We can do this from the terminal using the command mkdir (make directory) followed by the name of the folder you prefer.
I normally don't use spaces for my folders but you can use spaces by wrapping the name in quotes. Type in your terminal the following command.
mkdir first-test
or
mkdir "first test"
We could start coding now but in order to make it simpler (and learn another command) let's open our folder in VS Code. You can open any file or folder in VS code from your terminal by typing code followed by the name of the file/folder you'd like to open. Now, type in your terminal:
code first-test
or
code "first test"
A new Visual Studio Code window will open with only our empty folder. You can close the previous VS code window.
Starting your first JavaScript file
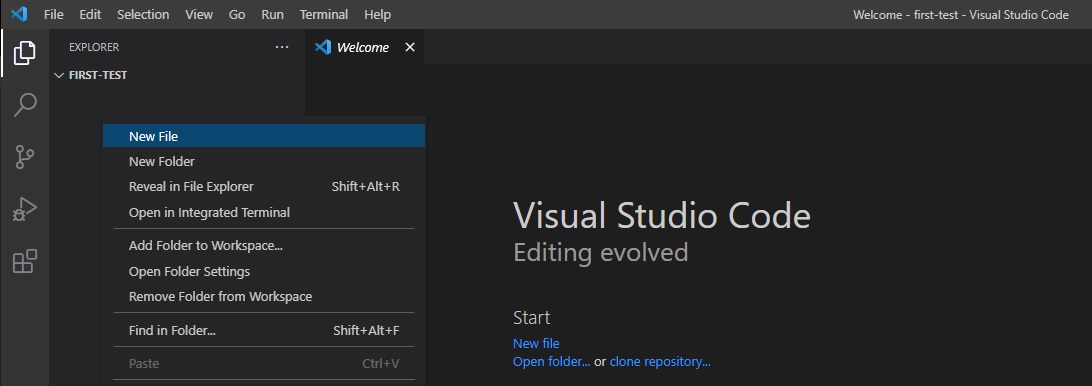
Right click in the left-side menu and click on "New file" to create a file called "index.js".
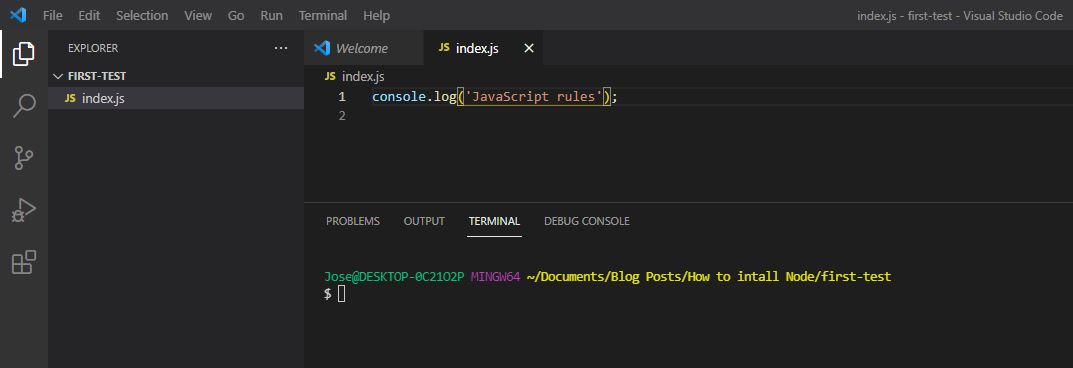
Open a new terminal like we did before. Now open the "index.js" file by clicking once on the new file and type in the editor console.log("JavaScript rules!") like in the picture below.
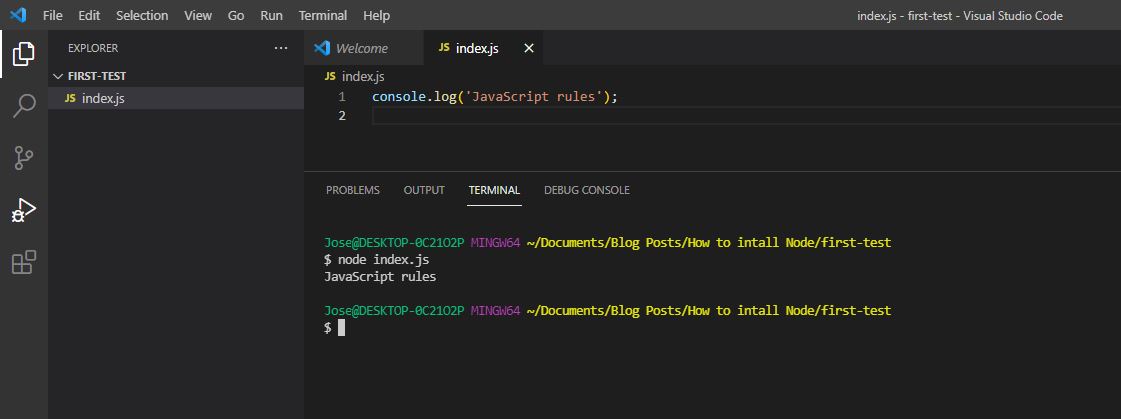
To run the script simply type in your terminal
node index.js
Congratulations! You've just created your first Node.js script!
If you liked this intro to Node.js or have any questions please hit me up on Twitter. Stay tuned for more tutorials to continue your journey with Node.js for SEO.


